
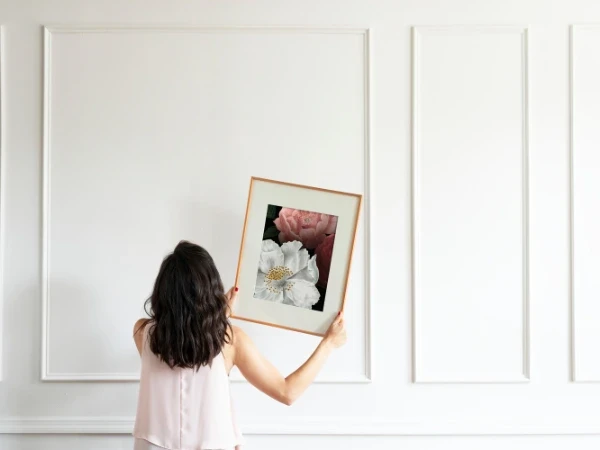
Concrete walls present a unique challenge when it comes to displaying artwork. Unlike drywall, which readily accepts nails and screws, concrete requires specific techniques and tools to ensure your art stays securely in place.
Whether you’re decorating a modern loft with exposed concrete features, a basement area, an office with concrete walls, or even a college dorm, this comprehensive guide will walk you through everything you need to know about hanging art on these tough surfaces.
Many people feel intimidated when faced with the prospect of hanging art on concrete, but with the right approach, you can transform these durable surfaces into the perfect canvas for your art collection. From no-drill solutions to heavy-duty mounting options, we’ll cover all the methods available for every situation and budget.
Understanding Concrete Walls
Types of Concrete Walls You Might Encounter
Before selecting a hanging method, it’s important to understand what type of concrete wall you’re working with:
- Poured concrete walls: Solid, dense, and extremely strong
- Cinder block or concrete block walls: Made of concrete blocks with hollow cores
- Concrete panel walls: Prefabricated concrete slabs often used in modern construction
- Stucco-covered concrete: Concrete with a textured surface treatment
The type of wall affects which hanging methods will work best. For example, cinder block walls have mortar joints that might be easier to drill into than the blocks themselves, while poured concrete offers uniform density throughout.
Weight Considerations
The weight of your artwork is a crucial factor in determining the appropriate hanging method:
- Light items (under 5 lbs): Adhesive hooks, tape, or putty often work well
- Medium items (5-20 lbs): Concrete adhesives, hardwall hangers, or lightweight drilling options
- Heavy items (over 20 lbs): Masonry anchors or concrete screws with proper drilling
Always choose a hanging method rated for at least 1.5 times the weight of your artwork to ensure safety and stability.
No-Drill Solutions for Concrete Walls
For renters, students in dorms, or those who prefer not to drill into their concrete walls, several effective options exist:
Adhesive Hooks and Strips
Modern adhesive hooks have come a long way in terms of strength and reliability:
- Command™ Picture Hanging Strips: Available in various weight capacities up to 16 lbs
- 3M Extreme Mounting Tape: Industrial-strength adhesive that can hold up to 20 lbs
- Gorilla Mounting Tape: Known for strong adhesion to rough surfaces including concrete
Pro tip: Clean the wall thoroughly with rubbing alcohol before applying adhesive products. Any dust or residue can significantly reduce adhesion strength. Wait at least an hour before hanging anything to allow the adhesive to fully bond.
Steps for using adhesive hooks:
- Clean the surface thoroughly with alcohol (not water)
- Peel and stick the adhesive to the hook
- Press firmly onto the wall for at least 30 seconds
- Wait an hour before hanging your artwork
Pros:
- Easy to apply and remove
- No holes or tools required
- Perfect for rental properties
Cons:
- May not adhere well to rough or textured surfaces
- Limited weight capacity (typically under 10-16 lbs)
- Not suitable for valuable or irreplaceable artwork

Hardwall Hangers
These specialized hangers use small pins that penetrate just the surface of concrete:
- Perfect for lightweight to medium-weight art (up to 25 lbs depending on brand)
- Minimal wall damage compared to drilling
- Easy to install with a hammer
How to use hardwall hangers:
- Choose a spot and align the hook
- Gently tap the pins into the wall with a hammer until they penetrate the surface
- Hang your artwork on the protruding hook
Pros:
- No drilling needed
- Can support up to 25 lbs
- More secure than pure adhesive solutions
Cons:
- Not ideal for very heavy items
- Can still leave small pin holes
- May not work on extremely hard concrete
Brick Clips or Clamp Hooks
For cinder block or brick walls, especially in unfinished basements or dorms, specialized clips that grip the edges are incredibly useful:
- Brick clips: Hook over the edge of exposed brick or block
- Cinder block clips: Designed specifically for standard cinder block dimensions
Pros:
- Absolutely no damage to the wall
- Easy to reposition
- No tools required
Cons:
- Only works with exposed edges or recessed joints
- Limited to specific wall types
- May not have a finished appearance
Adhesive Putty and Museum Gel
For extremely lightweight items like posters or small frames:
- Blu Tack or similar adhesive putty: Works well for items under 1 lb
- Museum gel: Designed specifically for securing items to surfaces
- Quake Hold: Originally designed for earthquake safety but works well for art mounting
These solutions work best on smooth concrete and may not adhere well to highly textured surfaces.
Drilling Solutions for Concrete Walls
When you need maximum security for your artwork, drilling into concrete is often necessary:
Essential Tools for Drilling Concrete
Before you begin, gather these specialized tools:
- Hammer drill: Regular drills can’t effectively penetrate concrete
- Masonry drill bits: Specially designed for concrete and stone
- Dust mask and safety goggles: Concrete dust can be harmful
- Vacuum or dust collection system: To manage dust during drilling
- Stud finder with concrete setting: To detect metal reinforcement or utilities
Types of Concrete Anchors
Several anchor types work well for hanging art on concrete:
1. Concrete Screws
- Features: Self-tapping screws with specialized threads for concrete
- Weight capacity: Up to 100 lbs depending on size and concrete type
- Installation: Requires pre-drilling a pilot hole slightly smaller than screw diameter
- Brands to look for: Tapcon®, Confast®
2. Sleeve Anchors
- Features: Expansion anchors that tighten as you turn the screw
- Weight capacity: 50-300 lbs depending on size
- Best for: Medium to heavy artwork and mirrors
- Installation: Drill hole, insert anchor, then tighten bolt
3. Concrete Wall Picture Hooks
Picture hooks designed for masonry are an excellent solution if you’re open to minimal drilling.
What you need:
- Masonry nails or concrete screws
- Masonry drill bit
- Hammer drill (optional but helpful)
Steps:
- Mark the desired height for your artwork
- Drill a small pilot hole using a masonry bit
- Insert a wall plug if necessary
- Screw in the picture hook or hammer in masonry nails
Pros:
- Very secure
- Supports heavier artwork
Cons:
- Requires drilling
- Leaves a permanent mark
Step-by-Step Guide to Drilling and Mounting
Preparing to Drill
- Mark your spot: Use a pencil to mark where you’ll drill
- Check for obstructions: Use a concrete stud finder to locate rebar or utilities
- Gather safety equipment: Dust mask, eye protection, and hearing protection
- Set up dust collection: Position your vacuum or use a dust collection attachment
Drilling the Hole
- Use the right bit: Select a carbide-tipped masonry bit matching your anchor size
- Set your drill to hammer mode: This provides the percussion needed for concrete
- Apply steady pressure: Let the drill do the work, don’t force it
- Drill slightly deeper than your anchor length
- Clear the dust: Use compressed air or a vacuum to remove dust from the hole
Installing the Anchor
- Insert the anchor: Tap it in with a hammer if necessary
- Tighten according to instructions: Different anchors have specific tightening requirements
- Leave enough of the screw exposed: For hanging your artwork
Hanging Your Artwork
- Use appropriate hanging wire or hardware on your artwork
- Consider using felt pads on the back corners to protect the wall
- Check that the piece is level after hanging
- Secure the bottom corners if needed to prevent shifting
Creative Solutions for Concrete Walls
Picture Rail or Wire Hanging Systems
For a gallery-style display, consider installing a picture rail or wire hanging system along the top edge of your wall.
Steps:
- Select a picture rail system rated for concrete installation
- Mount the rail to the wall using concrete anchors
- Attach hanging wires or cables to the rail
- Hang artwork from the wires using adjustable hooks
Pros:
- Ideal for multiple artworks
- Adjustable and damage-free once installed
- Allows easy rearrangement without new holes
Cons:
- Requires initial setup and drilling
- May not suit all decor styles
- Higher initial cost
Leaning Art Displays
Bypass wall hanging entirely with these alternatives:
- Picture ledges: Mount a single ledge or multiple ledges using concrete anchors
- Floating shelves: Display framed art alongside other decorative items
- Floor easels: For larger pieces that can rest on the floor
- Picture rails: Install at the top of the wall and hang art from specialized hooks
Alternative Display Methods
- Tension rods: Install floor-to-ceiling rods to hang art from
- Freestanding display panels: Create a “wall” in front of your concrete wall
- Suspended systems: Hang art from ceiling-mounted cables in front of the concrete wall
Temporary Walls and Covering Solutions
- Portable art walls: Freestanding panels you can place against concrete walls
- Fabric wall coverings: Create a soft surface that accepts pins or velcro
- Peel-and-stick wallpaper: Apply over concrete (if smooth enough) to create a more nail-friendly surface
Special Considerations for Different Concrete Surfaces
Textured Concrete
Rough or textured concrete presents additional challenges:
- Liquid nails or construction adhesive: Works well on textured surfaces
- Consider mounting art on backing boards: Attach the board to the wall, then hang art on the board
- Choose mounting hardware with deeper penetration: To get past the textured surface
Painted Concrete
- Check paint adhesion: Poorly adhered paint may peel when using adhesive hangers
- Test adhesives in an inconspicuous area: Some paints interact poorly with adhesives
- Be aware of paint damage: Drilling or using hardwall hangers will damage the paint finish
Historic or Decorative Concrete
- Consult preservation guidelines: Historic structures may have restrictions
- Choose minimally invasive methods: Prefer temporary solutions when possible
- Document original condition: Take photos before making any changes
Tips for Hanging Art Securely on Concrete
- Weight Check: Always verify the weight limits of your chosen method
- Surface Prep: Clean your wall thoroughly to ensure adhesives bond properly
- Double Up: For heavier items, consider combining methods (e.g., adhesive strip + hook)
- Test First: Try your method on a small, hidden area before committing
- Use appropriate level: Ensure your artwork is straight before finalizing installation
- Consider earthquake security: In seismic zones, add additional security measures
Troubleshooting Common Issues
When Adhesives Won’t Stick
- Check for sealers or treatments: Some concrete has water-repellent treatments
- Try roughening the surface slightly: Light sanding can improve adhesion
- Use a concrete primer: Specialized products can improve adhesive performance
Dealing with Drill Problems
- Hitting rebar: If you hit metal reinforcement, reposition your hole
- Bits overheating: Allow cooling breaks and use proper drilling technique
- Excessive dust: Improve dust collection or try drilling a small pilot hole first
Repairing Concrete After Removal
- Concrete patch products: For filling holes after anchor removal
- Color-matching techniques: To blend repairs with existing concrete
- When to call a professional: For significant damage or historical surfaces
FAQs About Hanging Art on Concrete Walls
What is the best way to hang things on concrete walls?
The best method depends on the weight and value of the artwork. For heavy pieces, go with concrete wall picture hooks or a picture rail system. For lighter art, adhesive hooks or hardwall hangers work great. Consider your willingness to drill holes and the permanence of your installation when choosing.
How do you attach art to a concrete wall?
Options include using masonry nails, hardwall hangers, adhesive hooks, or picture rails. Each has pros and cons depending on your wall type and artwork weight. For valuable pieces, consider professional installation with proper anchoring systems.
How to hang paintings on concrete walls without drilling?
Use hardwall hangers or adhesive hooks for lightweight to medium pieces. For heavier items without drilling, consider leaning art displays or freestanding solutions. Brick clips work well for cinder block walls with exposed edges.
Final Thoughts on Hanging Art on Concrete Walls
Hanging art on concrete walls requires more planning and specialized tools than hanging on drywall, but the results can be just as attractive and secure. By choosing the right method for your specific situation—considering the weight of your art, the type of concrete, and whether you need a temporary or permanent solution—you can successfully transform your concrete walls into the perfect backdrop for your art collection.
Remember that patience is key when working with concrete. Take your time to prepare properly, use the right tools, and follow safety precautions. With the techniques outlined in this guide, you’ll be well-equipped to tackle any concrete wall art hanging project with confidence.
Decorating concrete walls doesn’t have to mean complicated tools or permanent damage. Whether you’re dealing with smooth cement, rough concrete, or textured cinder blocks, there’s a solution that fits your needs—and your style. Go ahead, bring your space to life with your favorite pieces.

